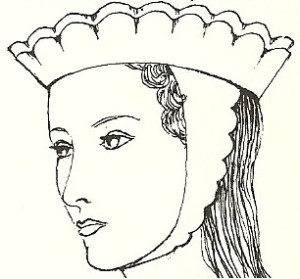
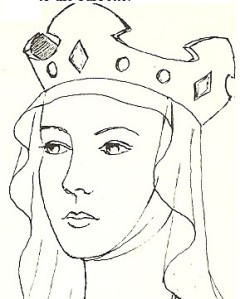
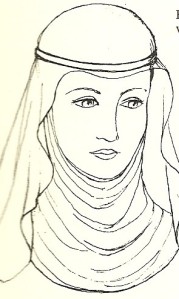
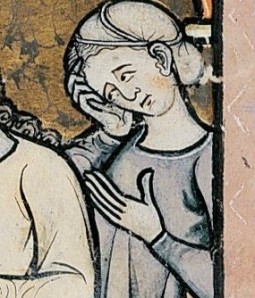
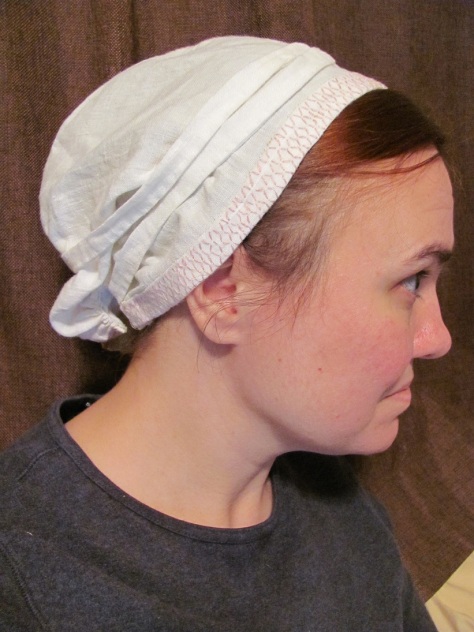
Pattern Your Own Simple Coif / Unpadded Arming Cap

Period Coifs / Caps
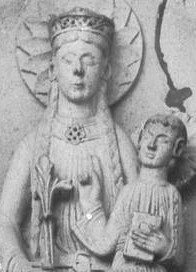
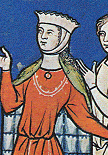
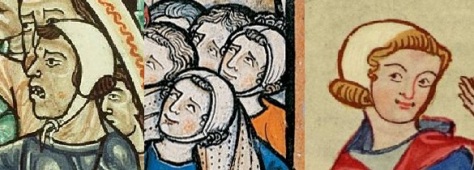
Left: 12th Century
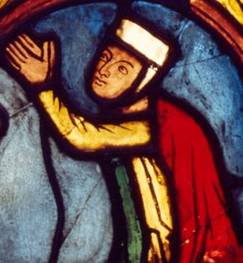
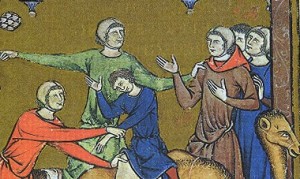
Middle: 13th Century
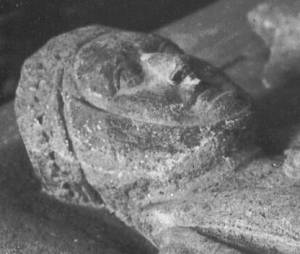
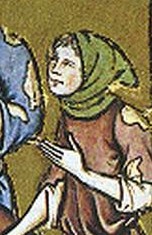
Right: 14th Century

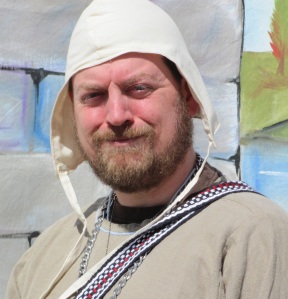
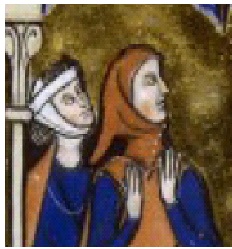
The plain coif/cap is probably the most versatile piece of garb in the Middle Ages. It was worn for centuries and  changed very little.  It was worn by both sexes. It’s comfortable, practical and easy to make.

Called many different thing, from coif, cap, or hood.  In other languages: koaff, bundhaube, kveiv, kveif, haube, coiffe, huva or kapper. It is essentially a close fitting hat, fastened under the chin using straps.

For events like Gulf Wars, Pennsic or Estrella, having several caps is a must. Keeps the sun off your head during the day and your head warm at night.

If you have kids wear medieval clothing, nothing looks cuter than a child running around wearing a plain linen or cotton coif! And since their hair is often thin or sparse, it keeps their head from burning.

Fabric:

  • Linen: if used under a helm, linen is a must. It wicks the sweat away from the head and gives a cooling effect.
  • Wool: if used to keep your head warm, a lightweight wool is nice. If it’s too itchy, line it with linen.
  • Cotton: a non-period less-costly alternative. Light muslin makes a nice summer coif to keep the head cooler.

 Colors

  • White-ish

 2 Piece Style:

  • Good from early period all the way through the 14th and possibly the 15th century.
  • Even women wore this style in the later centuries.
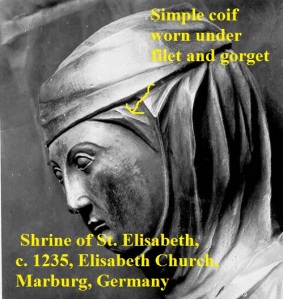
    • They used the simple coif under their veils, filets, wimples or gorgets to give something solid that those pieces could be pinned to.
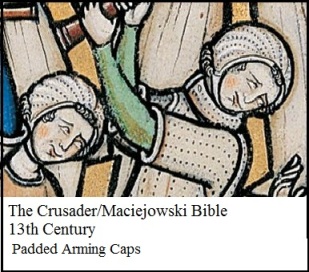
  • This style was used as a padded arming cap as well.

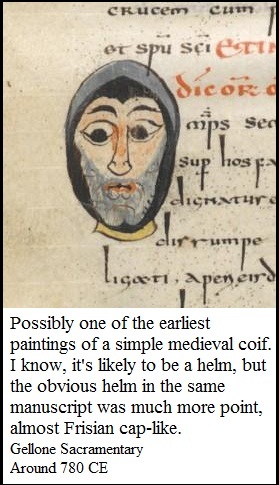
Simple Caps / Coifs in Period

8th Century

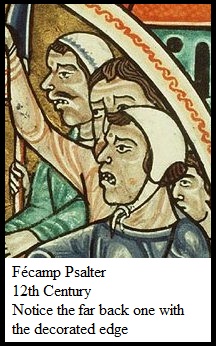
12th Century
Fecamp Psalter

12th Century
Hunterian Psalter

13th Century

Padded Arming Cap / Coif
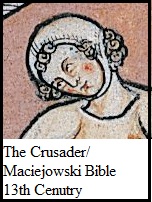
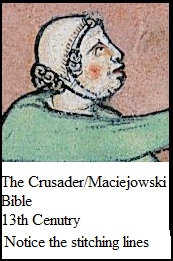
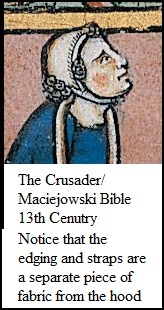
13th Century
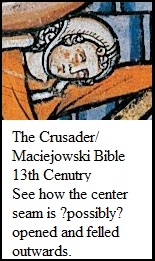
Morgan / Crusader / Maciejowski Bible

14th Century
Manesse Codex

14th Century
Roman de la Rose

15th Century

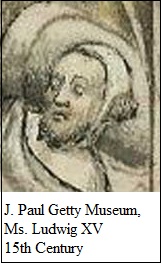
15th Century
Jean Froissart Chronicles

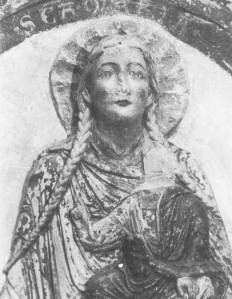
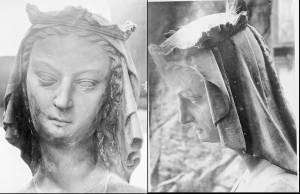
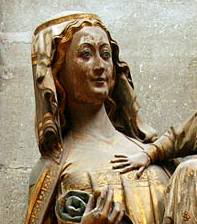
Even women wore simple coifs
13th Century Germany
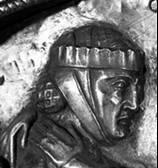
Shrine of St. Elizabeth

Measuring

I have a hypothesis: all garb patterns can be reduced to mathematical equations. Perhaps it’s true of all clothing in general, but I’m only working on garb.

click to enlarge

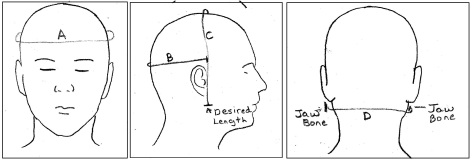
A = length around your crown

B = Measure around the larger part of the back of your head from the front of one ear to the front of the other ear

C = Measure from the desired length of your cap on one side, around the top of your head to the desired length on the other side.

D = Measure around the base of your head from jawbone to jawbone

A  = __________

B = __________

C = __________

D = __________

The Math

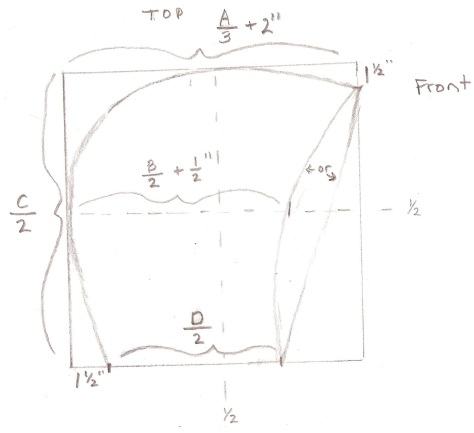
  1. Width of the pattern: Divide A by 3 {A/3} than add
    1. 2” for an average head
    2. 3” for a larger head
    3. 1” for a child’s head
    4. _________________
  1. Length of the pattern: Divide C by 2 {C/2}

_________________

  1. Draw a rectangle with the above dimensions
  2. Write “Top” and “Front” in the appropriate parts of your pattern
  3. Mark or fold the pattern in half in both directions, just for reference
  4. On the bottom edge:
    1. From the back, mark 1 ½ “ (1” for a child’s head)
    2. Divide D by 2 {D/2}
    3. _______________
    4. From the 1 ½” mark, go towards the front D/2.
    5. This is the bottom edge of your coif.
  5. On the center-line(halfway between top and bottom):
    1. Divide B by 2 {B/2}
    2. Add 1/2”
    3. ______________
    4. From the back side, on this centerline going towards the front, mark the above measurement
  6. On the front top edge
    1. Mark 1 ½” down from the top (1” for children)
    2. We’ll use this mark later

Click to enlarge

Connecting the Dots

  1. Let’s start at the bottom back.
    1. From your 1 ½” mark in (or 1” for a child’s cap)
    2. Curve a line up towards the back center-back
    3. Have the line meet the back edge about an 1 to 1 ½” below the center line
    4. Run the line along the back-edge through the center-back line and above it another 1 to 1 ½”
  2. Curve the line up towards the center top line
    1. Similar to the center-back, have the line meet the edge about ½ to 1” before the centerline and run along it for ½” to 1” after before curving down.
    2. Curve the line towards the 1 ½” mark (1” mark for children) on the front edge
  3. Front edge
    1. Two choices
      1. For a straight front: draw a straight line connecting the mark on the front top  edge to the D/2 mark on the bottom edge
      2. For a curved front: curve the line down towards the D/2 mark, intersecting with the B/2+1/2” mark on the centerline.

ADD YOUR SEAM ALLOWANCE when cutting  – ¼” to ¾” depending on your sewing style

Unless, you are making a 13th century styled cap with separate “hem tape.”

 Styles

Tight Fitting Cap

The above pattern will produce a fairly snug cap for you

Looser fitting Cap

To get a cap that is a bit looser, add an extra ¼” to 1” when adding the seam allowance.

Padded Arming Cap

This pattern can be used to make a padded cap as seen in the Crusader Bible.

  1. Add an extra ¾” to 1” to the pattern.
  2. Cut 4, rather than 2, pieces
  3. Sew the center and front together, but leave the bottom back open
  4. Make the quilting lines (the dashed lines you see in the picture)
  5. Stuff the hat with fluffed out cotton balls or scraps of linen. Use a wooden dowel or rod to pack the material into the grooves.
  6. Squish it around with your fingers so that the padding is mostly even.
  7. Hem up bottom back.

Making the straps

We’re making simple straps. You can customize them, but we’ll do simple first.

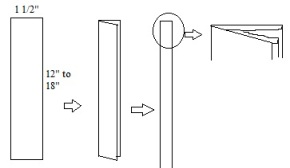
  1. Cut out two long rectangles of fabric
    1. About 1” to 1 ½” wide
    2. 12” to 18” long
  2. Fold them in half length-ways and iron.
  3. Fold each side in half length-ways and iron again.
  4. On one end of each strap, fold the rough end into the lengthwise fold to hem that side.
  5. Sew the edges

Sewing

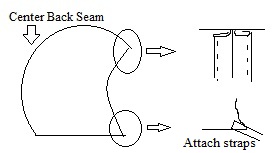
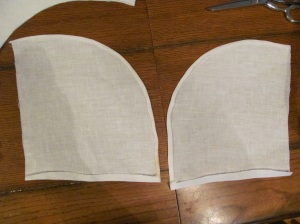
  1. Cut 2 of your coif pattern
  2. Sew up the center seam.
  3. Tuck under and iron the seam flat with each side folded over to its own side. Sew along edges to tack the seam down
  4. Hem the front and bottom by folding under the edges, ironing them flat and sewing them.
  5. Attach the straps to the front bottom corner

You are unless you want to add decorative elements if you like. Or leave it plain.

Enjoy your cap!!
On Yer Heade: Part II

Period Head Coverings

Or alternately, What Hat Goes with My Outfit?

13th Century

This post comes from a class I taught. It evolved from me standing in front of the mirror, event after event, trying to figure out what to wear on my head that would match the era of the outfit I was wearing. After doing a little research on what in general was worn each century, I was able to decide more quickly which hats went with which outfits. Maybe other folks have the same problem, I thought. Trying to use period sources rather than general costume books, I came up with this. I hope it helps you in your quest to appear more historically dressed.

13th Century

For Women

Headgear becomes much more complex for women this century. The up side is that there is far more variety to what we can wear. I’ll save most of the period pictures after the explanations of what everything is.

  • Braids
    • The simple braids are still around. Generally you’ll see them with one hanging on each side of the head.
  • Veil
    • We have the simple veil, although it is mainly seen worn by the lower classes.
    • There are loads of sites that show you how to make and wear a veil. Essentially, cut a circle, oval, rectangle or square. If you can, hand sew the edges with a rolled hem. Then you’re done. When I made my first veils, I couldn’t get the size right. Finally, I took some cotton muslin I bought on sale and made 3 or 4 mock-up veils. I thought the circle and the oval looked best on me. I made a few of different sizes – smaller for day use and larger for court garb.
    • Here’s one site, but it adds a band around the head, which is practical, but not necessary. http://costumeholic.blogspot.com/2010/04/making-and-wearing-medieval-veil.html
    • Maciejowski Bible
      1280

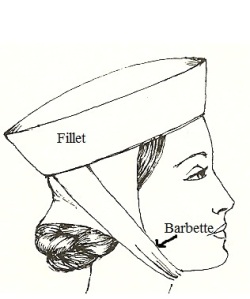
  • Barbette and Filet
    • Many of the complex headgear from this century uses the barbette and fillet.
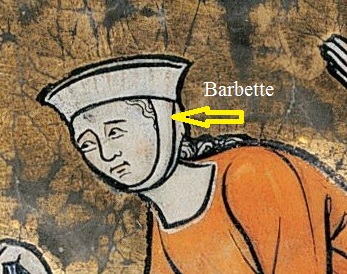
    • Barbette: a band of cloth that goes around the head and under the chin. It could be thin (~1”) or a wide band.
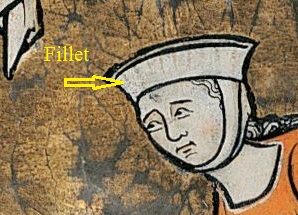
    • Fillet (aka coffee filter hat) was like a fabric crown. It could be tall or short.
    • The barbette and fillet are often seen together, but they can be worn in some styles separately.
    • Caitlin, from Caitlin’s Clothing, has a simple method of making a barbette and fillet.
      http://www.caitlinsclothing.com/cyclas.html#BARBETTE,%20FILLET%20AND%20CRESPINE
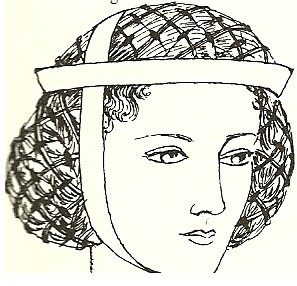
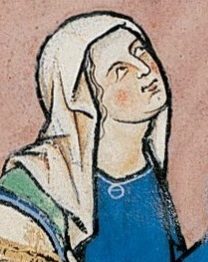
    • The picture to the below has the lady wearing a coif under her barbette and fillet.
    • Barbette and Fillet worn over a simple coif

  • Crespinette
    • A net usually worn with a fillet and barbette.
    • Wealthier women had jewels or beads woven throughout. They also could have their crespinette woven with precious metal threads.
  • Barbette worn with a Crown or Coronet
    • You can sometimes see a plain or decorative barbette worn with a crown. It helps if the crown needs to be secured.
  • Barbette or Filet with a Veil
    • A veil can be held more securely on the head with a barbette or filet by themselves – you don’t always have to wear both.
    • Personally, I don’t care for the barbette. It covers my ears and makes it even harder for my half-deaf self to hear. I do, however, like the filet with a veil. It holds the veil on nicely and is much more comfortable. Either way is perfectly fine.
    • In this drawing the lady is wearing a barbette with a veil and a crown.
  • Veil and Wimple
    • This century sees a rise in the popularity of the wimple – the drape-like thing that goes under the chin.
    • The wimple is simply a rectangle of cloth. It’s pinned to the filet. Then the veil is set on top of the filet/wimple combo.
    • The veil can be pinned to the filet as well or simply held down with a coronet or crown.
    • Here is a simple set of veil and wimple instructions http://www.rosieandglenn.co.uk/TheLibrary/Costume/CnTGuides/HowToWear/HTWToque.htm
    • Although you can’t see it in this drawing, she is wearing a filet (and probably a barbette) under the veil and wimple.
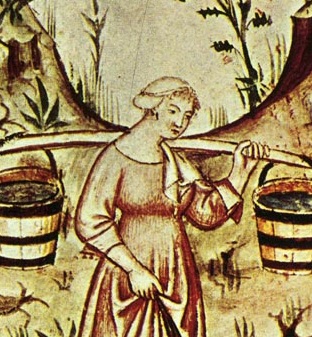
  • Cap
    • Possibly the most comfortable 13th and 14th century headgear is the cap, which is also called St. Birgitta’s Huva (I have another blog post solely on how to make one).
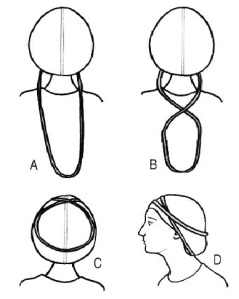
    • It’s a loose coif with one long continuous strap attached at the front bottom edges. The strap is then looped twice around the head to hold it in place.
    • A link to my explanation (I have many other links to other explanations too):
      https://maniacalmedievalist.wordpress.com/2012/10/01/st-birgittas-huva-cap/

Period pictures of these styles

  • St. Mary’s Church, Gelnhausen, Germany
    c. 1230-1235
    Long braids.

  • Church of Our Lady, Halberstadt, Germany
    1200-1225
    Braids.

  • Schnutgen-Museum, Cologne, Germany
    c. 1220-1230
    Fillet with barbette

  • Weschselburg, Germany
    c. 1235
    Fillet and barbette under coronet

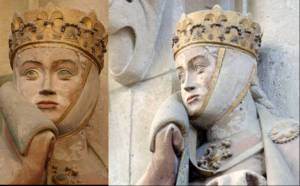
  • Naumburg Cathedral Germany – 1250
    Barbette and tall filet with crown.

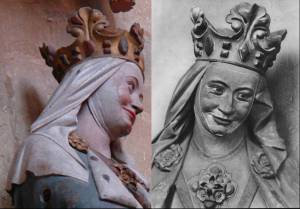
  • Meissen Cathedral, Meissen, Germany
    c. 1260

    • Fillet and barbette with a veil.


  • Elisabeth Church, Marburg, Germany
    c. 1235
    Fillet and barbette over a crespinette.

  • Braunschweig, Germany
    c. 1240-1250
    Veil and wimple. There is probably a filet and/or barbette under there.

  • Elisabeth Church, Marburg, Germany
    c. 1235
    Veil tucked around head and under wimple. Both under a large fillet.
  • Strasbourg Cathedral, Strasbourg, France
    c. 1280-1300
    Oval veil

  • Cathedral of Saints Catherine and Maurice, Magdeburg, Germany
    c. 1250
    Possibly layered veils. I like this one because it shows a decorated veil rather than a plain one.

  • Strasbourg Cathedral, Strasbourg, France
    c. 1280-1300

    • Veil is tucked around the head in a near headrail like manner.


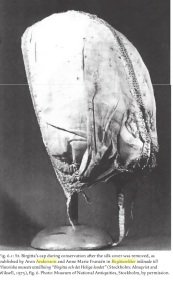
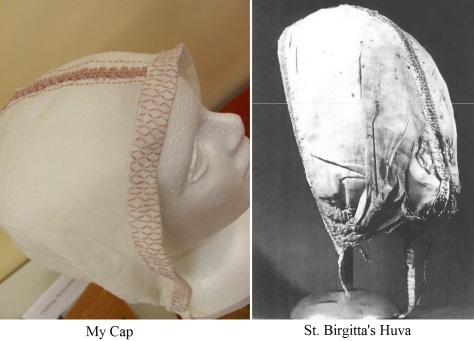
  • A picture of the actual St. Birgitta’s cap
    by C. Dahl

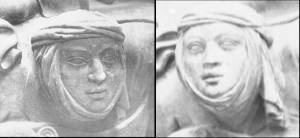
  • Woman on left wearing a cap.
    Woman on right wearing a veil and wimple over a fillet.

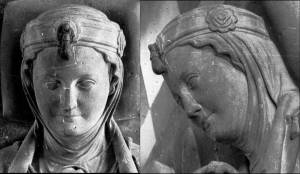
  • Decorative fillet with a barbette. Both over a coif.

For Men

  • Coif
    • The coif is still around. One difference is that it is no longer a rectangle folded, sewn up the back and then shaped.
    • You can see a center seam indicating that it is now two separate pieces sewn together.
    • It can still be worn by itself or under a hood or hat.
    • Here’s a simple arming cap pattern you can use for a simple coif. Just don’t stuff it.
      http://www.arador.com/articles/armingcap.html
    • Simple coif. Shaped with a center seam.

  • Hoods
    • The hood is starting to evolve in what will later be know as the liripipe.
    • But for now, it only has a small tail or tippet.
    • Simple hood tutorial (remember to keep the tail small):
      http://tutorials.abbott.me.uk/home/hood
    • It can still be a loose hood that slips on over the head.
    • Or it can made more form fitting by using buttons down the front, such as the one below
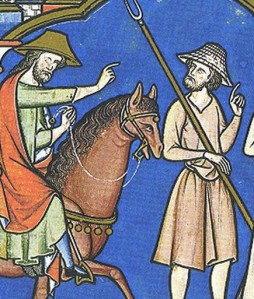
  • Straw Hats
    • Non-fabric hats are starting to be seen
    • Mostly by the lower classes of people such as farmers and peasants.
    • Men with straw hats and a woman with a crespinette.

    • Straw hat

Coming soon: 14th century . . . to be continued on another post.

St. Birgitta’s Huva (Cap)

About 3 years ago I ran across a blog about a hat. Doesn’t sound exciting, but the hat just blew me away. It’s a beautiful and complex 13th century cap called St. Birgitta’s huva.

And it looked more comfortable than most other 13th and 14th century headgear.  An article detailing the cap and its history was written by Camilla Luise Dahl and Isis Sturtewagen and published in 2008 in the 4th volume of Medieval Clothing and Textiles. In the article, Dahl and Sturtewagen suggest that the cap wasn’t worn in the strap under the chin sort of way, but that it was worn in a way that we see in  13th and 14th century manuscripts such as the Maciejowski Bible and Tacuinum Sanitatis. The tie was wrapped around the head twice to secure the cap to the head.

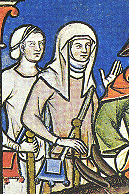
Maciejowski Bible 13th Century
Worn like the cap on the far right.

Tacuinum Sanitatis, 14th Century

In this time period, like most SCA time periods, most adults wore headgear. There are a few exceptions, but covering your head was the norm. Women’s headgear wasn’t always comfortable.

The barbette
covers your ears and makes it hard to hear, on top of being uncomfortable.

The fillet
doesn’t stay on that well without a barbette, which isn’t comfortable.

The veil
gives you no peripheral vision and can make sitting in a chair with a back difficult.

St. Birgitta’s cap is comfortable, stays on rather well even without the chin strap, doesn’t cover the ears or take away from your vision and is really pretty. The perfect 13th and 14th century hat!

It’s Features:

  • Small white linen cap, with white embroidery done on the front edge.
  • The cap is split into two pieces which are held together with open work linen embroidery or lacing running from the forehead to the nape of the neck.
  • Tiny pleats are used on both sides to create a bit more fullness to the bottom of the cap.
  • A narrow tie extends from each side of the cap and is suspected to have been made into a continuous loop

How the cap was worn:
Medieval clothings and textiles vol. 4. Fig 6.11 (Dahl 122)

Constructing it

A good pattern can be found here: http://www.textilverkstad.se/pdf/funderingar_kring_en_huva.pdf. The article is unfortunately not in English. I tried my best to translate it. It mostly makes sense, and certainly enough sense to construct the hood: My Birgittas Huva translation

Pattern it out based on your head. I used the basic pattern found in the Birgitta’s Huva file. I made a couple of cotton mock-ups, but this pattern fit the best. I’m using a lightweight linen fabric.

Press the center seam by folding under twice and making a running stitch to tack it down. I also pressed the bottom seam where the gathers go. Since the front edge will be encased in the edging/ties, it doesn’t need a seam.

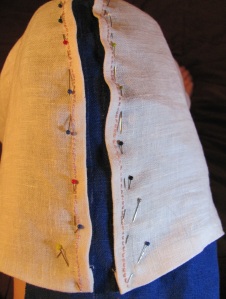
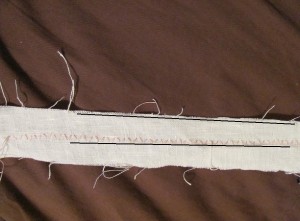
I preparation for doing the center embroidery, I marked the blue fabric with two lines about 1 to 2 cm apart. I then pinned the center of each side of the cap to each line. You can kindof see my white line on the blue fabric. The blue fabric is just for holding the hood pieces in place while I embroider them together. You can also see my pink running stitch.

If you are not comfortable embroidering, you can simplify the cap significantly by adding an extra 2 cm to the pattern for each center seam and simply sew the center together. The embroidery makes it look so much better, but it isn’t necessary at all.

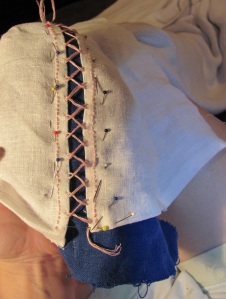
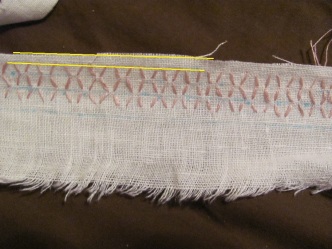
The first run of the herringbone stitch. You can see the marks I made with my blue water soluble marker. They are about 1 cm apart. For the first run of the herringbone stitch, use every other mark. The unused marks will be used for the 2nd run of the herringbone stitch, thus making it a double herringbone stitch.

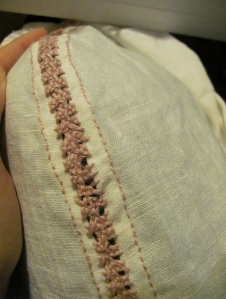
This is just after the second run of the herringbone stitch. I just took the pins holding the cap to the blue fabric out. The herringbone stitch pulls the sides together, which is why I’m holding the center seam apart in order to see the stitching. The interlacing of the herringbone stitching will stiffen the center embroidery a bit so that it doesn’t squinch together.

Interlaced double herringbone stitch. I read quite a few tutorials on this stitch. It can get confusing, very confusing. This one (http://www.embroidery.rocksea.org/stitch/herringbone-stitch/interlaced-herringbone-stitch/) made the most sense to me. With both the herringbone stitches and the interlacing, beginning and ending threads was a big pain in the tush. I have not perfected it by any means, and I’ve tried several methods. Do your best to work the end back into the fabric and tie it in a solid knot, and then snip off the ends. It’s not the best way, I am sure. But with the center fabric not meeting in the middle, it’s not easy to work the threads back into the previous stitches.

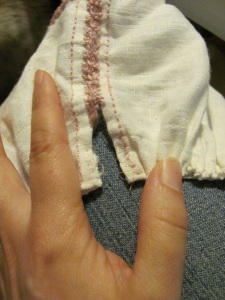
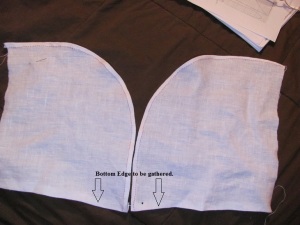
Leave about 1″ of the center (near the edge to be gathered) unconnected.

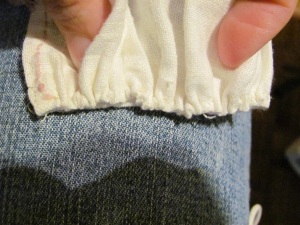
Gather the bottom edge by making two sets of running stitches about 5 mm apart along the bottom edge.

Pull the gathers until the bottom edge is about 3 to 3 1/2 inches by pulling both sets of running stitches.

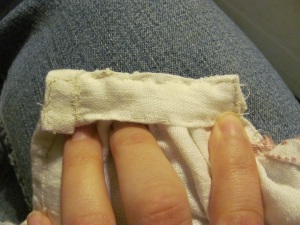
I took a bit of linen fabric, hemmed it and sewed it to the gathers to keep them nice and tight. My stitches are horrid at this point, but it was about 3 am the night before the event that I entered this piece into. It’s never a good idea to try and stay up all night to finish an item. It’s better simply to enter it at a later date. Lesson learned!

The front band.

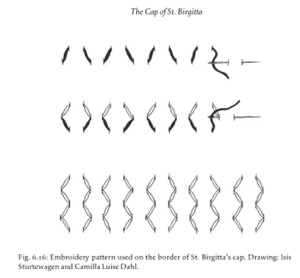
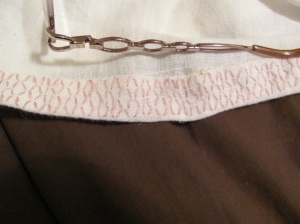
The embroidery on the front band looks like a series of hexagons. This was achieved using 4 parallel rows of “V” shaped stitches. Isis and Camilla suggest that the design was made like this:

(Dahl p139)

It’s a basic counted thread stitch, meaning you count the threads up or down and over to get the design. The fabric I chose did not have an even weave, so I did the best I could. Counted thread is not my best stitch. One thing I did learn is that cutting the strip isn’t the best idea. I cut about a 1 1/4″ of fabric so that I would use 1/4″ on each side for the hem and have 3/4″ for the band.


If you look closely, my embroidery is getting closer and closer to the edge. Rip your fabric, don’t cut it.  Or pull out one thread and cut along that line. Link for help.


My next attempt was much more parallel.


Again, I’m not terribly proud of my 3am stitching, but it got the job done.


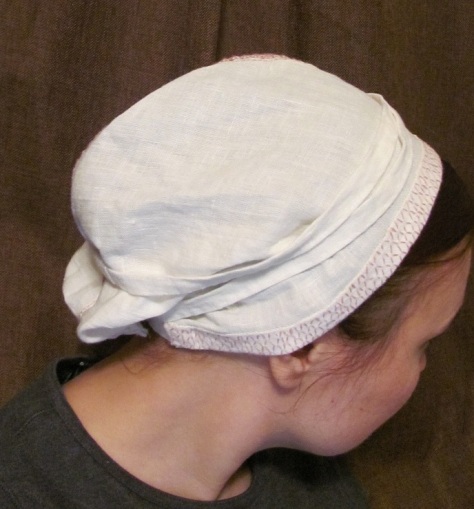
The tie is a simple hand-sewn tie. It’s about 4 feet long, but it can be shorter or longer depending on your head and the amount of hair you have. Attach one end, wrap it around your head as shown in the picture, and pin it where it looks right. Do some light tacking and wear it once or twice to see if it’s the right length before snipping off the extra and sewing it a bit more securely.

And it’s done!!
I definitely need to shove some fake hair into the back to give it the fullness, but I’m very happy with the way it turned out.

Good Articles and Sites on St. Birgitta’s Huva: