The plain coif/cap is probably the most versatile piece of garb in the Middle Ages. It was worn for centuries and changed very little. It was worn by both sexes. It’s comfortable, practical and easy to make.
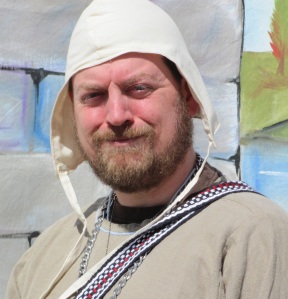
Called many different thing, from coif, cap, or hood. In other languages: koaff, bundhaube, kveiv, kveif, haube, coiffe, huva or kapper. It is essentially a close fitting hat, fastened under the chin using straps.
For events like Gulf Wars, Pennsic or Estrella, having several caps is a must. Keeps the sun off your head during the day and your head warm at night.
If you have kids wear medieval clothing, nothing looks cuter than a child running around wearing a plain linen or cotton coif! And since their hair is often thin or sparse, it keeps their head from burning.
Fabric:
- Linen: if used under a helm, linen is a must. It wicks the sweat away from the head and gives a cooling effect.
- Wool: if used to keep your head warm, a lightweight wool is nice. If it’s too itchy, line it with linen.
- Cotton: a non-period less-costly alternative. Light muslin makes a nice summer coif to keep the head cooler.
Colors
- White-ish
2 Piece Style:
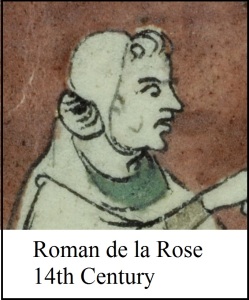
- Good from early period all the way through the 14th and possibly the 15th century.
- Even women wore this style in the later centuries.
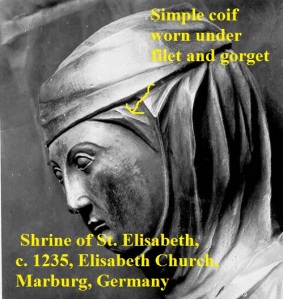
- They used the simple coif under their veils, filets, wimples or gorgets to give something solid that those pieces could be pinned to.
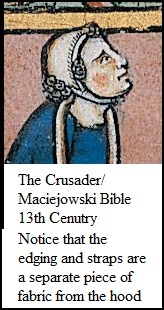
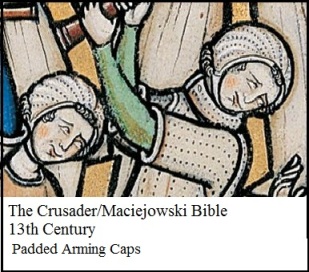
- This style was used as a padded arming cap as well.
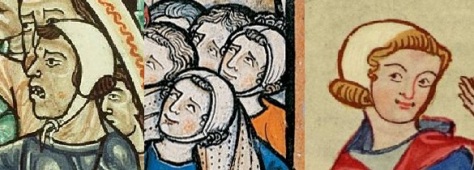
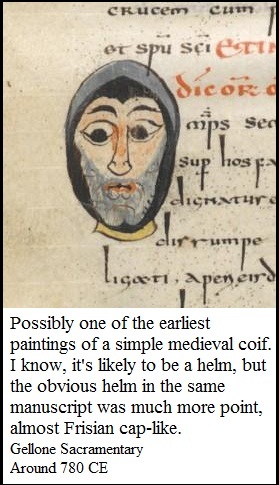
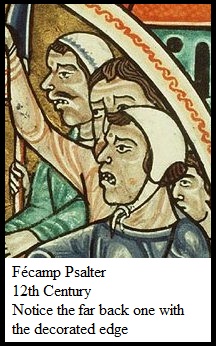
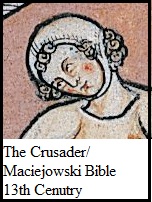
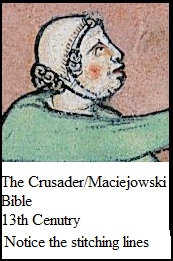
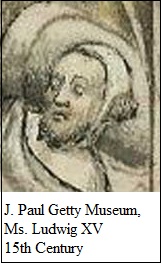
Simple Caps / Coifs in Period
Measuring
I have a hypothesis: all garb patterns can be reduced to mathematical equations. Perhaps it’s true of all clothing in general, but I’m only working on garb.
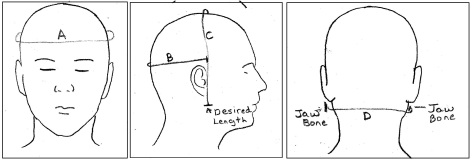
A = length around your crown
B = Measure around the larger part of the back of your head from the front of one ear to the front of the other ear
C = Measure from the desired length of your cap on one side, around the top of your head to the desired length on the other side.
D = Measure around the base of your head from jawbone to jawbone
A = __________
B = __________
C = __________
D = __________
The Math
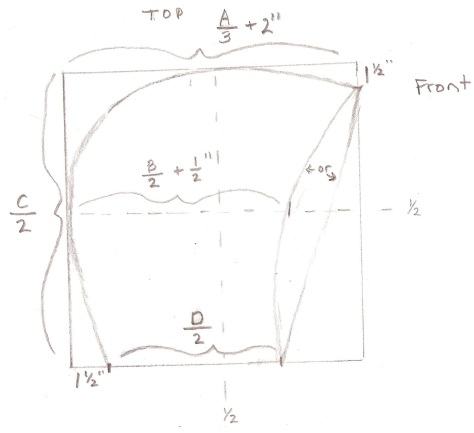
- Width of the pattern: Divide A by 3 {A/3} than add
- 2” for an average head
- 3” for a larger head
- 1” for a child’s head
- _________________
- Length of the pattern: Divide C by 2 {C/2}
_________________
- Draw a rectangle with the above dimensions
- Write “Top” and “Front” in the appropriate parts of your pattern
- Mark or fold the pattern in half in both directions, just for reference
- On the bottom edge:
- From the back, mark 1 ½ “ (1” for a child’s head)
- Divide D by 2 {D/2}
- _______________
- From the 1 ½” mark, go towards the front D/2.
- This is the bottom edge of your coif.
- On the center-line(halfway between top and bottom):
- Divide B by 2 {B/2}
- Add 1/2”
- ______________
- From the back side, on this centerline going towards the front, mark the above measurement
- On the front top edge
- Mark 1 ½” down from the top (1” for children)
- We’ll use this mark later
Connecting the Dots
- Let’s start at the bottom back.
- From your 1 ½” mark in (or 1” for a child’s cap)
- Curve a line up towards the back center-back
- Have the line meet the back edge about an 1 to 1 ½” below the center line
- Run the line along the back-edge through the center-back line and above it another 1 to 1 ½”
- Curve the line up towards the center top line
- Similar to the center-back, have the line meet the edge about ½ to 1” before the centerline and run along it for ½” to 1” after before curving down.
- Curve the line towards the 1 ½” mark (1” mark for children) on the front edge
- Front edge
- Two choices
- For a straight front: draw a straight line connecting the mark on the front top edge to the D/2 mark on the bottom edge
- For a curved front: curve the line down towards the D/2 mark, intersecting with the B/2+1/2” mark on the centerline.
- Two choices
ADD YOUR SEAM ALLOWANCE when cutting – ¼” to ¾” depending on your sewing style
Unless, you are making a 13th century styled cap with separate “hem tape.”
Styles
Tight Fitting Cap
The above pattern will produce a fairly snug cap for you
Looser fitting Cap
To get a cap that is a bit looser, add an extra ¼” to 1” when adding the seam allowance.
Padded Arming Cap
This pattern can be used to make a padded cap as seen in the Crusader Bible.
- Add an extra ¾” to 1” to the pattern.
- Cut 4, rather than 2, pieces
- Sew the center and front together, but leave the bottom back open
- Make the quilting lines (the dashed lines you see in the picture)
- Stuff the hat with fluffed out cotton balls or scraps of linen. Use a wooden dowel or rod to pack the material into the grooves.
- Squish it around with your fingers so that the padding is mostly even.
- Hem up bottom back.
Making the straps
We’re making simple straps. You can customize them, but we’ll do simple first.
- Cut out two long rectangles of fabric
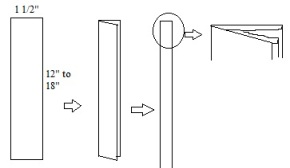
- About 1” to 1 ½” wide
- 12” to 18” long
- Fold them in half length-ways and iron.
- Fold each side in half length-ways and iron again.
- On one end of each strap, fold the rough end into the lengthwise fold to hem that side.
- Sew the edges
Sewing
- Cut 2 of your coif pattern
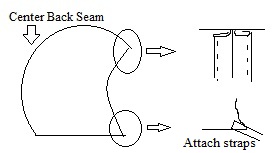
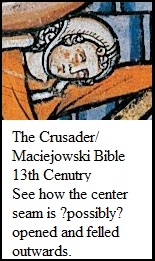
- Sew up the center seam.
- Tuck under and iron the seam flat with each side folded over to its own side. Sew along edges to tack the seam down
- Hem the front and bottom by folding under the edges, ironing them flat and sewing them.
- Attach the straps to the front bottom corner
You are unless you want to add decorative elements if you like. Or leave it plain.
Enjoy your cap!!



[…] https://maniacalmedievalist.wordpress.com/2012/11/02/pattern-your-own-simple-coif-unpadded-arming-cap… […]
thanks for your excellent review. lista de emails lista de emails lista de emails lista de emails lista de emails
Thanks I’m getting in to heavy fighting an I need one of these I’m going to give the patteren a try for sure!!!
[…] The simple 2 piece coif […]
[…] Kveiv ressurs og oppskrift. […]
[…] Kveiv ressurs og oppskrift. […]
Thank you for this incredibly useful pattern. I appreciated the use of so many measurements as it meant I was able to get a good fit on the first go.