About 3 years ago I ran across a blog about a hat. Doesn’t sound exciting, but the hat just blew me away. It’s a beautiful and complex 13th century cap called St. Birgitta’s huva.
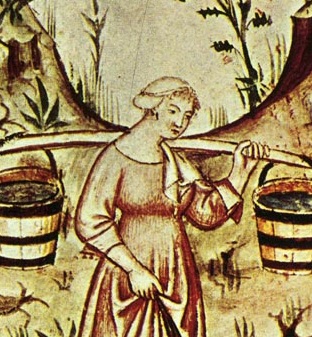
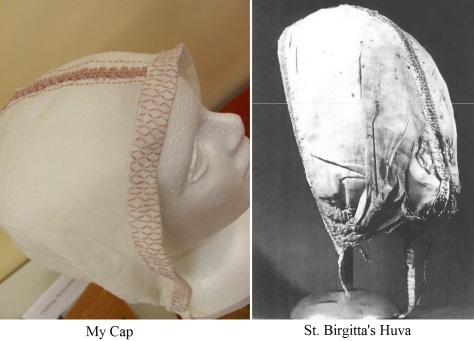 And it looked more comfortable than most other 13th and 14th century headgear. An article detailing the cap and its history was written by Camilla Luise Dahl and Isis Sturtewagen and published in 2008 in the 4th volume of Medieval Clothing and Textiles. In the article, Dahl and Sturtewagen suggest that the cap wasn’t worn in the strap under the chin sort of way, but that it was worn in a way that we see in 13th and 14th century manuscripts such as the Maciejowski Bible and Tacuinum Sanitatis. The tie was wrapped around the head twice to secure the cap to the head.
In this time period, like most SCA time periods, most adults wore headgear. There are a few exceptions, but covering your head was the norm. Women’s headgear wasn’t always comfortable.
The barbette 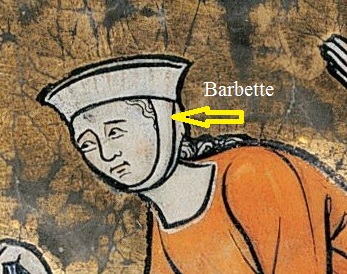
covers your ears and makes it hard to hear, on top of being uncomfortable.
The fillet 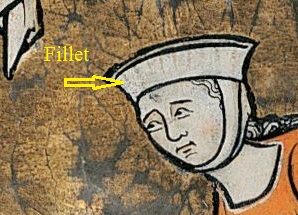
doesn’t stay on that well without a barbette, which isn’t comfortable.
The veil 
gives you no peripheral vision and can make sitting in a chair with a back difficult.
St. Birgitta’s cap is comfortable, stays on rather well even without the chin strap, doesn’t cover the ears or take away from your vision and is really pretty. The perfect 13th and 14th century hat!
It’s Features:
- Small white linen cap, with white embroidery done on the front edge.
- The cap is split into two pieces which are held together with open work linen embroidery or lacing running from the forehead to the nape of the neck.
- Tiny pleats are used on both sides to create a bit more fullness to the bottom of the cap.
- A narrow tie extends from each side of the cap and is suspected to have been made into a continuous loop
How the cap was worn:
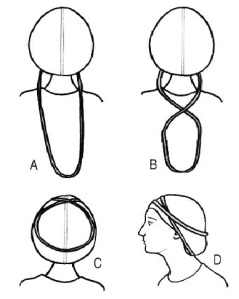 Medieval clothings and textiles vol. 4. Fig 6.11 (Dahl 122)
Constructing it
A good pattern can be found here: http://www.textilverkstad.se/pdf/funderingar_kring_en_huva.pdf. The article is unfortunately not in English. I tried my best to translate it. It mostly makes sense, and certainly enough sense to construct the hood: My Birgittas Huva translation
 Pattern it out based on your head. I used the basic pattern found in the Birgitta’s Huva file. I made a couple of cotton mock-ups, but this pattern fit the best. I’m using a lightweight linen fabric.
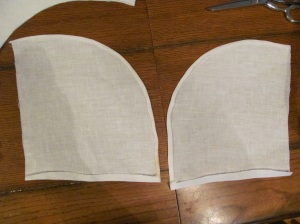 Press the center seam by folding under twice and making a running stitch to tack it down. I also pressed the bottom seam where the gathers go. Since the front edge will be encased in the edging/ties, it doesn’t need a seam.
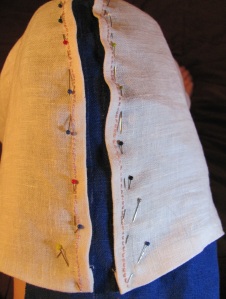 I preparation for doing the center embroidery, I marked the blue fabric with two lines about 1 to 2 cm apart. I then pinned the center of each side of the cap to each line. You can kindof see my white line on the blue fabric. The blue fabric is just for holding the hood pieces in place while I embroider them together. You can also see my pink running stitch.
If you are not comfortable embroidering, you can simplify the cap significantly by adding an extra 2 cm to the pattern for each center seam and simply sew the center together. The embroidery makes it look so much better, but it isn’t necessary at all.
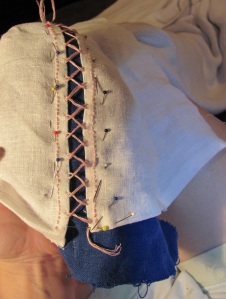 The first run of the herringbone stitch. You can see the marks I made with my blue water soluble marker. They are about 1 cm apart. For the first run of the herringbone stitch, use every other mark. The unused marks will be used for the 2nd run of the herringbone stitch, thus making it a double herringbone stitch.
 This is just after the second run of the herringbone stitch. I just took the pins holding the cap to the blue fabric out. The herringbone stitch pulls the sides together, which is why I’m holding the center seam apart in order to see the stitching. The interlacing of the herringbone stitching will stiffen the center embroidery a bit so that it doesn’t squinch together.
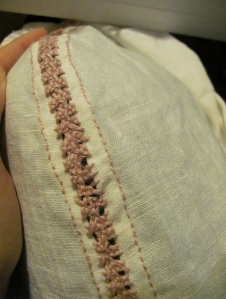 Interlaced double herringbone stitch. I read quite a few tutorials on this stitch. It can get confusing, very confusing. This one (http://www.embroidery.rocksea.org/stitch/herringbone-stitch/interlaced-herringbone-stitch/) made the most sense to me. With both the herringbone stitches and the interlacing, beginning and ending threads was a big pain in the tush. I have not perfected it by any means, and I’ve tried several methods. Do your best to work the end back into the fabric and tie it in a solid knot, and then snip off the ends. It’s not the best way, I am sure. But with the center fabric not meeting in the middle, it’s not easy to work the threads back into the previous stitches.
Leave about 1″ of the center (near the edge to be gathered) unconnected.
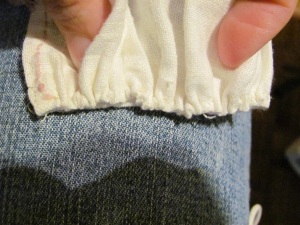
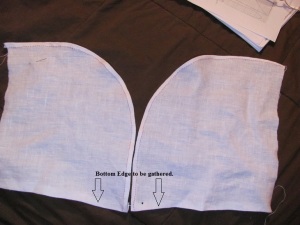 Gather the bottom edge by making two sets of running stitches about 5 mm apart along the bottom edge.
Pull the gathers until the bottom edge is about 3 to 3 1/2 inches by pulling both sets of running stitches.
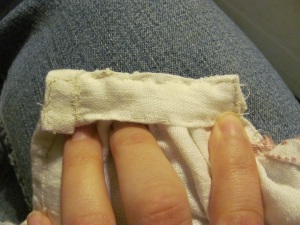 I took a bit of linen fabric, hemmed it and sewed it to the gathers to keep them nice and tight. My stitches are horrid at this point, but it was about 3 am the night before the event that I entered this piece into. It’s never a good idea to try and stay up all night to finish an item. It’s better simply to enter it at a later date. Lesson learned!
The front band.
The embroidery on the front band looks like a series of hexagons. This was achieved using 4 parallel rows of “V” shaped stitches. Isis and Camilla suggest that the design was made like this:
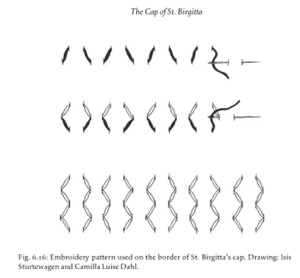
(Dahl p139)
It’s a basic counted thread stitch, meaning you count the threads up or down and over to get the design. The fabric I chose did not have an even weave, so I did the best I could. Counted thread is not my best stitch. One thing I did learn is that cutting the strip isn’t the best idea. I cut about a 1 1/4″ of fabric so that I would use 1/4″ on each side for the hem and have 3/4″ for the band.
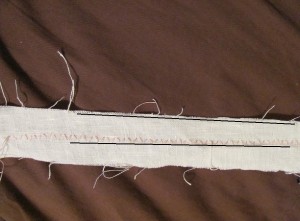
If you look closely, my embroidery is getting closer and closer to the edge. Rip your fabric, don’t cut it. Or pull out one thread and cut along that line. Link for help.
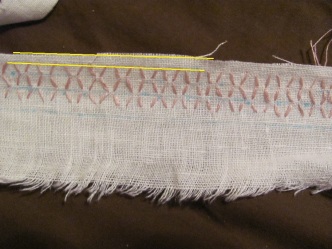
My next attempt was much more parallel.
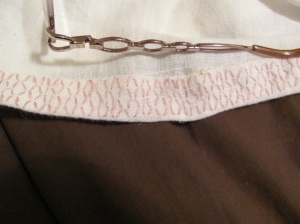
Again, I’m not terribly proud of my 3am stitching, but it got the job done.

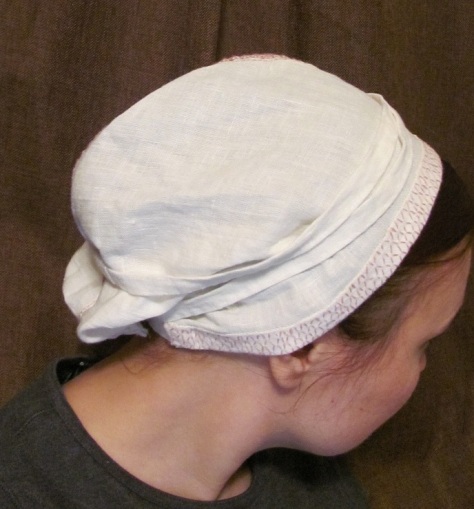
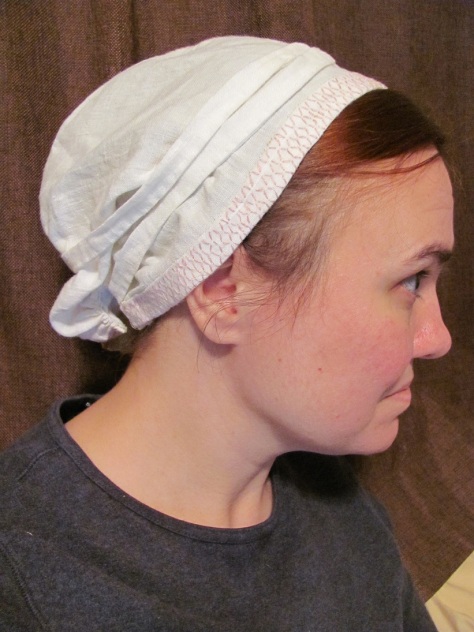
The tie is a simple hand-sewn tie. It’s about 4 feet long, but it can be shorter or longer depending on your head and the amount of hair you have. Attach one end, wrap it around your head as shown in the picture, and pin it where it looks right. Do some light tacking and wear it once or twice to see if it’s the right length before snipping off the extra and sewing it a bit more securely.
And it’s done!!
I definitely need to shove some fake hair into the back to give it the fullness, but I’m very happy with the way it turned out.
Good Articles and Sites on St. Birgitta’s Huva:
- Åsa Martinsson. Thoughts after reading Camilla Luise Dahl, Birgittas Huva. http://www.textilverkstad.se/pdf/funderingar_kring_en_huva.pdf in Swedish, but look above for the link to my translation
- Amanda Marksdottir, who has a Ph.D. in viking archeology, has a good write-up on her construction of the cap. If you get a chance, look at her other stuff. She is truly AWESOME!! http://ragnvaeig.livejournal.com/417135.html
- Arachne’s Blog. She does a really nice job of constructing it. and she talks about her mistakes, which is always helpful. http://windwraith.blogspot.com/search/label/the%20Cap%20of%20St.%20Birgitta
- Ilish O’Donovan, the Medieval Milliner’s St. Birgitta’s Cap. I don’t care for her center embroidery, but her cap is very neat. http://medievalmilliner.blogspot.com/2009/09/st-birgitta-cap.html
- Marc Carlson’s St. Birgitta’s Coif: http://www.personal.utulsa.edu/~marc-carlson/cloth/birgcoif.html
- Medieval Silkwork. Of the reproductions I’ve seen, her’s hangs the best.
http://m-silkwork.blogspot.com/2008/11/womens-caps.html - Middelaldercentret. The article is in Danish, but it’s interesting. Plus I LOVE the interlacing she did, but I have no idea what technique she used.
http://middelaldercentret.dk/Projekter/Tekstilprojekter/konehue.html - A discussion, also in Swedish, all about the cap. http://histvarld.historiska.se/histvarld/forum/topic.asp?TOPIC_ID=5732 Bing Translator is your friend! It’s worth looking over the discussion. There are quite a few good tips in here.
- And of course, the original article: Dahl, C.L. & I. Sturtewagen. “The Cap of St. Birgitta. “ Netherton, Robin & Gale Owen-Crocker, ed. Medieval Clothing and Textiles vol. IV, pp. 99-142. Boydell Press: 2008. You can get it through inter-library loans – it is worth the read.

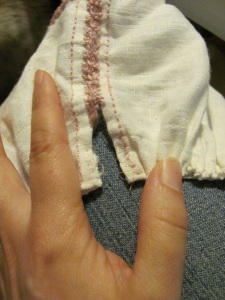
I wonder if you could cheat and use narrow linen bobbin lace for the middle section?
Not cheating, just an alternative method. 🙂 That would actually work nicely. Although I don’t know if hand-made bobbin lace would be any quicker.
I’m enjoying your blog immensely! You might try google translate. I have certain languages like Russian and Dutch set to automatically translate the page. And when I received a letter from a Dutch publication I typed the letter into the translate box and it was great news!
Keep writing and I’ll keep reading!
[…] A link to my explanation (I have many other links to other explanations too): https://maniacalmedievalist.wordpress.com/2012/10/01/st-birgittas-huva-cap/ […]
[…] I have a full write-up of the coif and instructions on making it in another post: St. Birgitta’s Huva […]
[…] a veil. This cap is also known as St Birgitta’s cap, and I used the information provided by Maniacal Medievalist to draft my […]
What skill level would you consider this? I am a beginner, but I think I need one of these!
The basic cap could be modified for a beginner. Simple leave off the embroidery that connects the two pieces and connect them with a running stitch. Increase your pattern pieces to compensate for that missing 1/2″ where the embroidery is.